Saturday, January 5, 2013

(White) Bean Gratin

The Story

Whenever we are home for the holidays, we celebrate Christmas Eve with a Dungeness-crab dinner. It's the perfect ratio of prep to social time: it takes no time to prepare (especially since we often buy the crab from the local fish monger, pulled directly out of his boiler on purchase) but it provides us with 45-60 minutes of social time at the table, as each person cracks, picks, and eats his/her individual crab. They year, however, the crabs hadn't filled in, and we received the devastating news that the opening of commercial crab season on the north coast of California, and all of Oregon and Washington state, is delayed until January 1st (which, alas, has been pushed back one final time until the 15th!). We could likely have picked up non-local crab at the supermarket, but Eddie and I agreed that would miss the whole point. With this in mind, I set about establishing a Christmas Eve menu that wouldn't be too time consuming but would still be special enough to feel like a holiday.

As the basis of the meal, I picked up an extremely-tasty uncured ham from the local Co-op and decided to prepare two family favorite side dishes--creamed cucumbers (recipe here) and Ensalada Russa (I can't believe I haven't shared this recipe already, since it's a holiday staple. I'll get it up here the next time I make it.)--since we could prepare both early in the day and pull them out at dinner time. I also decided on the always-easy-to-make couscous with vegetables, but I wanted a second hot side dish. Lucky for me, one of the Weight Watchers recipes featured that week on the website was a tasty-looking White Bean, Tomato, and Spinach Gratin. Eddie, my mom, and I prepared it together, and it turned out great. Everyone loved it--enough so that there was only one tiny portion left after Eddie, my mom, Keith, our friend Lola, and I finished the meal (and even then, I imagine politeness may have preserved that one portion!). I'm making the recipe again tonight, tweaked to reduce the Weight Watchers point value a wee bit and make use of what I have on hand.

What You'll Need
  • 2 cans cannellini beans, drained and rinsed. (I learned that cannellini beans are white kidney beans, and I don't see any reason you couldn't use red kidney beans--or any other decently-firm bean, for that matter--which is what I decided the put the white in parenteses when naming this recipe.)
  • 5-6 ounces baby spinach, kale, or other green. We've been getting kale from our farm share recently, so I've been choosing that over spinach. You can certainly add more than six ounces, too. I add as much as I can reasonably wilt in my largest skillet.
  • 2 large onions, thinly sliced. (I picked up a small food mandolin, and I can't tell you how much I like it for recipes like this!)
  • 2 cans diced tomatoes, drained
  • 3/4 cup panko bread crumbs
  • 1/4 cup shredded Parmesan cheese
  • 4 teaspoons olive oil, divided in half. The original recipe called for two tablespoons butter for the second half, but I used the olive oil and it worked fine--and increased the health quotient) 
  • 1 and 1/2 teaspoons fresh lemon juice
  • 1/4 cup white wine (It's always good to be able to use up an opened bottle in the refrigerator!)
  • 2 tsp. fresh rosemary, minced
  • 2 tsp. minced garlic
  • salt
  • cooking spray

Preparation  
  • Preheat oven to 375°F. Coat a glass casserole dish (10 x 7 ish) with cooking spray and set aside. 
  • Heat 2 tsp. oil in a large nonstick skillet over medium heat. Add onions and 1 tsp salt and cook, stirring frequently, until softened and onions begin to brown, about 15 minutes. 
  • Stir in garlic and cook for 1 minute. Stir in wine and cook until evaporated. 
  • Add beans, tomatoes, spinach, rosemary, and lemon juice and cook, stirring occasionally, until spinach has wilted, about 1 to 2 minutes. 
  • Spoon mixture into prepared dish and set aside. 
  • Add bread crumbs, cheese, 2 tsp oil, and 1 teaspoon salt and stir until completely combined. Spoon crumb mixture over bean mixture and bake, uncovered, until browned and bubbly, about 20 to 25 minutes. 

Serving
We had this as a side dish for the holidays, but tonight we're making it our meal, since the beans and veggies make it satisfying. By dividing it into three portions, we'll each have a tasty dinner tonight--plus left overs for later in the week! (Weight Watchers, this makes six 7-point servings, three 13-point servings, or any number of other portion/point combinations, depending on quantity and whether you treat it as a side or main dish.)

Potato-Leek Soup

The Story

It's wintertime, and my farm share turns to a (mostly) pick-your-own system. Last Sunday, we collected our first harvest, including a couple pounds of already-harvested potatoes and ten leeks I picked myself. At the time I didn't have any real plan for these items, but I came up with the idea of adding another new soup to our repertoire and began investigating potato-leek options online. Based on our healthier eating habits over the past few years, I immediately discounted anything involving heavy cream, but I made note of the variety of herbs and such they included along the way. There were a few healthier options, too, so I looked at proportions and decided what might work. This is what I ended up with, and the results were pretty darned tasty!

What You'll Need
  • Leeks, 2 cups white and light-green parts, cleaned and chopped (Leeks have got to be the dirtiest vegetable out there! Slice them and let them sit in a bowl of water for a few minutes. Skim the leeks off the top, discard the dirty water, and repeat as needed.)
  • Potatoes, 2-3 pounds, peeled and chopped into small pieces
  • 4 cups chicken or vegetable stock
  • 2 cups water
  • 2 tsp olive oil (This is my magic amount and I use it to replace whatever amount of butter or oil that recipes recommend when cooking on the stove top. It's enough to saute whatever I need in a non-stick pan, and little enough to keep my recipes healthy.)
  • salt and pepper. (You'll need more salt than you think, since there are potatoes here; how much will depend on the saltiness of your stock. I put a couple teaspoons in when cooking the leeks in the first step and salted a bit after serving.)
  • herbs and spices (How vague can I be, right? One recipe called for fresh marjoram, thyme, and parsley; others had different variations. I used what I had on hand--fresh rosemary, dry oregano, cumin, cayenne pepper--and it was delicious. You know what you like, so start with that and see how it goes.) 
  • red chile sauce (I used the cayenne instead, but if you don't have it on hand, a dash of this at the end will jazz things up!) 

Preparation
  • Chop leeks and saute lightly in olive oil in the bottom of a medium soup pan. Reduce heat to low and cook covered for 10 minutes. I also added my herbs, spices, salt, and pepper here. You may hold out some fresh herbs until the final stage rather than cooking them, should you choose.
  • Add potatoes, stock, and water. Bring to a boil, reduce heat, and let simmer for 25 minutes.
  • Using the hand blender, mix until the desired consistency. If you don't have a hand blender, you can remove half of the contents, throw it in a regular blender, and return to the pan. (I would HIGHLY recommend a hand blender purchase if you don't already own one. For a $15-20 investment, you'll get tons of use out of it. Plus it takes up a lot less room than most kitchen electronics.)
    
Serving
Garnish with fresh herbs and serve with fresh bread or on its own. The recipe above, using 2.75 pounds of potatoes, made 5 hearty stick-with-you-through-the-day servings. (If you're a Weight Watcher, each serving is 6 points.) 
    

Saturday, December 1, 2012

Pumpkin/Squash Soup

The Story

It's been some time since I've posted a new recipe, which illustrates one meaning of "occasional" intended by my blog title. (Isn't it nice when laziness or inactivity can be justified so wonderfully?) Today, however, I'm making this dish for a second time and feel confident that I've made it my own and can share it with you. First off, I'll have to admit that I'd never tried to make pumpkin soup before this year, However, my friend Justine game me some pumpkins to decorate with at a party in September, and when my mother-in-law was visiting last month I decided to take the plunge and turn them into something edible. I checked out a bunch of recipes on the internet, chose ingredients and noted preparation tips that seemed to fit the direction I wanted to go in, and whipped up a batch of pumpkin and squash soup. Gioia, Eddie, and I all enjoyed the results--not bad for a first attempt!  Yesterday I got a winter squash in my farm share, so I decided to refine my recipe. Here's what I've come up with:

What You'll Need
  • One large pumpkin/squash or 2-3 smaller
  • 5 cups stock (I use chicken, but veggie would obviously work)
  • 1 apple
  • 1 onion
  • 2 carrots
  • 2 teaspoons olive oil
  • 6 oz. fat-free plain or vanilla Greek yogurt (or heavy cream if preferred)
  • ground cumin (optional, but I love cumin in everything)
  • sage or thyme
  • salt and pepper
  • cayenne or red pepper
  • cinnamon/allspice/honey (something sweet)  
  
Preparation
  • Quarter the pumpkin/squash, remove the seeds, place on a baking sheet or dish and bake in over at 350 degrees for 45 minutes. Let cool.
  • Peel and chop the carrot, apple, and onion and saute in olive oil in the in the bottom of your soup pan. 
  • Peel off pumpkin skin or scoop out flesh, chop or break into pieces, and add to soup pot
  • Add stock
  • Add spices to taste. I think this simply comes down to a matter of personal preference, so throw in what seems right to you. We like a balance of spicy and sweet, so I play with the balance of pepper and cinnamon/allspice. If you're going to add heavy cream or vanilla yogurt you won't have to worry too much about the sweet end of things here. If you opt for plain yogurt, a bit of honey will help.
  • Heat to a boil and reduce heat. Simmer for 30 minutes.
  • Using a hand blender, blend soup to the consistency you prefer. (Or puree in batches in a food processor or regular blender.) I made it really smooth the first time around, but left it a bit chunkier the second time, and we liked both.
  • Add the yogurt or cream, heat to temperature desired for serving and serve.

1/9/12 Update: Because I had an abundance of squash and wasn't in a hurry, I decided to try this in a slow cooker. I basically doubled everything except the stock, since only four cups fit comfortably in the pot. There's no need for oil: I just threw the onions, apples, and carrots right in. I cooked it on high for five hours or so, and the results seem pretty much the same. Now, though, I have 6-8 servings of soup to look forward to!

Serving
There's not much to it, really. You could wait to put a dollop of yogurt or cream in the bowl just before serving to make it look pretty--and/or add a sprig of parsley or other herb for appearance. It is wonderful as it is or served with a hearty bread.

And, if you're waistline conscious, note that I divide this into 4 hearty servings of 4 points each in Weight Watchers. That's with the non-fat plan yogurt, of course, so cream will cost you more at the scale.


Saturday, January 28, 2012

Slow-Cooker Lentil Soup (a la Weight Watchers)

The Story

I've been planning to add this recipe to my blog for a week or so, but I was finally motivated when my Aunt Mary sent me an email for a recipe exchange--in which I am asked to type up a recipe, email it to a friend of hers, and then forward the same email (this time with her name as the recipient) to 20 of my friends. In theory, the email says that I may get up to 36 recipes in return, although I haven't done the math there. A month or two ago, I may have simply deleted this request, but there are new reasons for me to participate: the creation of this blog, the fact that my Aunt Mary used a recipe from it recently and it gave us a chance to correspond, and my desire to get a few new recipes.

I'm not really one who checks out recipes very often. In fact, as those of you who know me are well aware, I'm historically not one to cook very often either. Eddie has always been the main cook in our household, with me pitching in when we have dinner guests or throw a large party. That has changed a bit in recent months, though, due to my return to Weight Watchers in August. I've been a WW member before--many times before, in truth--and I've always known it's a healthy weight-loss program. I've successfully lost weight with WW in the past, but I've never been motivated enough to stick with it and reach my goal weight--consequentially rebounding down the road and putting on even more weight. However, each time I go back to WW, the program is even easier and smarter than the time I last joined. And, after five months and 35 pounds, I am feeling confident that this time around both the plan and the timing are right for me.

I won't bore you with all the details, but suffice it to say that we've been making some changes in our eating habits at home. Not only are we eating healthier things--more fruits and vegetables, for one--but I'm also participating in the process of meal preparation, and particularly in the planning. While Eddie used to do all the grocery shopping, I am frequently the shopper now. When he used to ask me what I wanted for dinner, I would often shrug my shoulders or snap at him; now, I put out the ingredients for each meal and he does the cooking. It's a nice symbiosis and better for both our health and our marriage. Despite these positive changes, our repertoire of healthy and tasty meals has been growing a bit repetitive in the past month, since the novelty has worn off, so I had been thinking about trying something new. Thinking is as far as it got until this recipe caught my eye when I signed on to WW eTools (one of the new options available since the last time I joined and also a big reason for my success) to track my food one rainy day. Weatherwise, soup sounded appealing, but I thought that this recipe also looked incredibly easy to make and might serve as a good alternative to the eternal pot of Variable Chili which had been serving as a staple.  So, I decided to give it a try, and it was such a smashing success that I made a second batch as soon as we finished the first. I've made a few alterations to the original, and I encourage you to see what choices you can make that will make the recipe your own.

What You'll Need
  • 1 bag dry lentils, picked over
  • 8 cups chicken or vegetable stock 
  • 1 cup shitake mushrooms, cut in thin strips (I reconstitute dry ones. Note that this is an alternative suggested by WW, as the original recipe called for 4-5 pieces of Canadian bacon, chopped and added 30 minutes prior to serving. We like the mushrooms, though, so we're sticking with them.)
  • 2 large carrots, chopped into chunks
  • 4-5 stalks celery, chopped into chunks
  • 1 onion, chopped into chunks
  • 3-4 cloves garlic, diced
  • 1 tsp sage (the original recipe calls for 1/2)
  • cumin (not in the original recipe, but my favorite spice)
  • 3-4 bay leaves
  • cayenne pepper (also not in the original, but I thought it could use a bit of kick)
  • salt and pepper to taste (remember to salt at the end, so as to prevent hardening the lentils)
  • NOTE: The vegetables above are pretty standard. However, over time I have started throwing in whatever veggies I have left at the bottom of the week. Beets, green beans, fennel, bell peppers--even tomatillos: every combination has resulted in a tasty product.
Preparation
  • Chop the vegetables into large chunks and distribute them evenly over the bottom of your slow cooker
  • Throw in the herbs and spices (sans salt)
  • Spread lentils evenly over surface
  • Add stock
  • Cook on low for 6-8 hours. There is no need to stir.
  • To thicken before serving, I get out the handblender and run it for a couple minutes in the pot. Alternatively, pull out a cup or two of the lentils and veggies and puree them in your food processor.
Serving
I divide this into 6-7 healthy-sized servings (each 5-6 points, for you Weight Watchers out there) which make a fine main course, and the recipe could easily serve 8-10 with an accompanying salad and/or bread. It's tasty as soon as it's ready, but it also keeps for several days (likely even longer, but that's as long as it lasted at our house!) and microwaves nicely. The original recipe suggested adding a dash of white vinegar to the top for added flavor, but the cayenne pepper I added seems to do the job fine. If you want to leave flavoring up to the eater, hot sauce and/or sour cream might be tasty as well.

Friday, January 13, 2012

Variable Chili

The Story 

Everyone has a different idea of what constitutes a good bowl of chili, as witnessed by the large number of chili cook-offs and a huge range of ingredients in recipes for this basic dish. Chili in Texas is different than chili in Arkansas, which is different yet from chili in Ohio. So, it is with trepidation that I share with you the recipe for what constitutes a good bowl of chili in my household.

My Grandma Michalski made chili and my mother made chili, and the basics of my recipe come from them. When I started cooking for myself, I simply started from their examples and added the ingredients that I had on hand and took it from there. The one thing it's important to note is that there are endless opportunities to make alterations to this recipe, which is the reason for me naming it as I have in this posting. In fact, I'm going to start by providing you with the ingredients of the most recent pot of chili I made, which are likely different than the ingredients from the pot I made before that. And so on.

What You'll Need (more or less)
  • 4 16-oz cans of tomatoes, 2 diced and 2 stewed
  • 3 16-oz cans of beans (kidney, black, chili, pinto...I usually use a combination)
  • one 64-oz can or bottle of tomato juice (V-8 works in a pinch)
  • mushrooms, canned or fresh and sliced
  • one whole onion, chopped
  • 2 carrots, thinly sliced
  • 1 red bell pepper, chopped
  • jalapenos, diced
  • 5 bay leaves
  • cumin
  • chili powder
  • habanero sauce, to taste
Variations
As I mentioned earlier, there's not really an"official" list of ingredients for this recipe. The most common variations in my household include the following:
  • I throw in whatever vegetables I have on hand--chopped squash, any type of pepper, even kale or spinach--especially those nearing the end of their usable life.
  • At times I'll add a bit of honey or Mexican spiced chocolate, to balance a batch that is particularly hot
  • It's a no-brainer to add ground beef, chicken, or any other protein here if I'm looking for a heartier meal. 
  • Because it cooks a long time, sometimes I throw in dry beans rather than canned--or even stew my own tomatoes when they are available (not so often in Humboldt County).
  • Spices are always an easy way to play around with a dish, so I try new spices, hot sauces, chopped garlic, and the like, depending on what I have on hand.
After you make your first pot, you'll likely develop some variations that suit you and your family and/or take advantage of locally available products.  

Preparation
One reason this dish is ubiquitous in our household is how easy it is to make. Every couple weeks I get out the crock pot and throw in all the ingredients. (Before I had a crock pot, I used the same process on the stove top; it required a bit more attention, but I found that even slightly burning the chili on the bottom wasn't problematic--but just added a smoky flavor.) I cook it covered on high until it bubbles and stews for a couple hours, and then I reduce the heat to low and crack the lid to let steam out and cook it for the remainder of the day. At the end of the first day I let it cool and store it in the refrigerator for the night. The next morning I return the crock to its heater and let it cook again on low throughout the day--with the lid cracked to allow the liquid to boil off a bit. While it takes longer to do this two-day cooking process, it isn't time consuming to let the pot run on its own, and it's really the secret to decent chili: the more times you heat and cool it, the better it seems to get.

Serving
I often serve the chili with chopped raw onions and/or shredded cheese scattered on the top, along with crackers or tortilla chips. Most often, Eddie and I will have this for one main meal and then I divide it into individual-serving containers for lunches or dinners later in the week--or even into the next. It's easy to reheat in the microwave or on the stove top, and I love knowing that I have some chili waiting for me after a long day or when the rain and wind are howling and I don't want to cook.


Wednesday, December 21, 2011

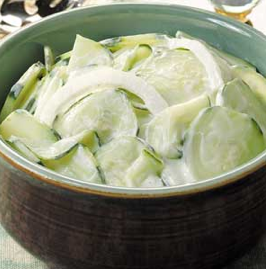
The McIntyre Girls' Michalski-Family Creamed Cucumbers


The Story

I don't remember many vegetables gracing the table at Michalski family holidays. Gatherings with my mom's family included loud uncles and some great food--fresh polish sausage, fruit salad (with a creamy covering), stuffing, fresh bread, ham or turkey, grandma's amazing banana cream pie--but vegetables were never a priority. Sure, the ubiquitous-Midwest green bean casserole would rear its head every now and then, but the vast majority of our holiday dishes were protein, carbs, and sugar. The one exception was a cucumber dish, and even those cukes were floating in some serious mayonnaise.

A number of years back when we started adding some dishes popular in Eddie's family to our holiday meals, Sarah and I decided to resurrect a few of our own. This was partly made possible when Sarah located a Polish butcher in Tigard (a SW suburb of Portland) that makes fresh polish sausage; it was like finding a bit of childhood in our backyard, and we try to visit Victor's European Meat Market at least one holiday per year. When considering a second family dish, the cucumbers came to mind (maybe because we're not ready to attempt banana cream pie), and we decided to try them out.  After getting the basic recipe from mom, Sarah and I made some changes to the dish: substituting traditional ingredients for favored equivalents (English cucumbers for standard, white onions for yellow), reducing the amount of mayonnaise, and refining the preparation to make the dish less liquidy. The result is a new twist on a traditional family dish, appropriate for all seasons but served only at the holidays in our home. 
What you'll need
  • 2-3 English cucumbers (usually individually wrapped in the supermarket), thinly sliced
  • 1 white onion, thinly sliced
  • mayonnaise (homemade or olive-oil based for the best flavor); my friend Teri recently suggested trying the recipe with sour cream instead, which I night do in the future
  • white vinegar (we often use apple vinegar when we have it)
  • salt
  • pepper (white preferred)
  • sugar (small amount)
Preparation
Note: While the soaking process takes some time, this dish is very easy to make and can be done between other cooking tasks.
  • Remove half the peel of the cucumbers (more for appearance than necessity) by using a peeler to take off long strips
  • Slice the cucumber into discs, as thin as possible
  • Immerse sliced cucumbers in a bowl of (very) salty water and let set until cucumbers are visibly reduced due to water loss (usually 1-2 hours or so)
  • In another bowl, combine mayonnaise, vinegar, pepper, and sugar. There are no set measurements here, and you should balance the taste based on your own preferences to create approximately 1-1/2 cups of liquid. (Sarah is the master of this stage.) Don't add salt yet, though, as the cucumbers will be salty after soaking!
  • Add the onions to the liquid and let stand
  • When the cucumbers are less firm and thinner, pour out the water. For best results, squeeze the cucumbers to get more of the remaining liquid out. Sarah and I generally do at least two rounds of squeezing--literally balling up clumps of cucumbers in our hands and squeezing into fists--and sometimes three. This is important so the cucumbers can absorb the liquid you created. (Our Grandma Michalski never had patience for this, so the results were always soupy.)
  • Mix the cucumbers into the onion/liquid mix and set aside for an hour or so before serving, stirring regularly; at this stage, you can make adjustments in the balance of sweet and salty, based on your preferences. You can refrigerate them if desired, but I'd recommend pulling them out 1/2 hour or so before the meal for best flavor.
Presentation/Serving
I always like to serve the cucumbers in a floral lidded serving dish that belonged to Grandma Michalski, by way of her mother, my Great-grandmother Wrobleski. Once the recipe becomes a favorite in your household, I'm sure you'll find it deserving of a similar dish of honor.

Tuesday, December 20, 2011

The Fornari Family Lasagna

The Story

Eddie's family is Italian and has a long-standing tradition of lasagna on Christmas. Over the past 15 years or so we've tried to maintain this tradition when time and circumstance allow--even to go so far as to make our own pasta. It's a time-consuming endeavor, but it gives us a group activity for the time between opening presents on Christmas morning and having the meal in the evening. Because the pasta making is the most time consuming task (and one best undertaken with 3-4 devoted cooks at a minimum), this year my sister and I have agreed on a compromise operation: we're going to purchase fresh pasta at the market, make the traditional family sauces, and assemble and bake the lasagna.

One of my favorite things about this recipe is the hand-written version I have of it. When they were in the U.S. one year for the holidays, we asked Gioia and Nonna--Eddie's mother and grandmother--to write down the recipe for us.  Here's the scanned version:

[Waiting for Eddie to help me scan the document.]

As you can see, translating the recipe from this original (narrated in Italian by Nonna to Gioia) is part of the fun and challenge involved. In part, we need to consider the equivalent of European measurements (What is 1/2 a bottle of milk, for instance?), and then there's the added ambiguity of punctuation and wording from Gioia, a non-native English speaker (realizing that "4 tbs of flour salt and pepper" don't mean 4 tablespoons of each of those things, for example).

For simplicity's sake, I'll provide the recipes for the two sauces used and general pasta preparing directions that can be used for store-bought, fresh, or homemade pasta.


Sauce 1: Meat sauce (We usually double this recipe for the holiday meal, to make a full-sized, thick lasagna)

What you'll need
1 large onion, chopped
3 garlic cloves, minced
Fresh parsley, diced
1 carrot 1/12 lb. ground hamburger
1 cup olive oil (we often use 3/4 of a cup)
1 can tomatoes, crushed

Preparation
Heat oil in a large pot
Add all ingredients and brown at high temperature
Add salt and pepper
Keep alert (This is my favorite instruction from the original, so I had to include it!)
When meat is browned, add tomatoes and two cans of water
Reduce heat to medium
Cook covered until sauce is reduced and has very little liquid


Pasta 

What you'll need
Lasagna noodles
  • The worst option (but still tasty because of the sauces) is to buy two boxes of lasagna noodles from the grocery store. It's generally really thick compared to the pasta we roll ourselves, though, so we prefer not to make the lasagna if this is our only option.
  • A good option is to find a store or restaurant that makes fresh lasagna noodles. You'll need to cook and cool them, but it cuts out a lot of time otherwise spent mixing, rolling, and drying. For this year's lasagna we bought 6 whole sheets of pasta from Pastaworks in Portland, rolled it out a bit thinner, and cut it into thick strips; it was quite good and we're likely to repeat this process next year unless we're feeling ambitious.
  • The best option, of course, is to make and roll out your own lasagna noodles; we've managed to roll them thin enough to get 10-12 layers in a single pan. It sounds like a lot, but when the pasta is fresh and thin, it melts in your mouth. In general, we take a standard pasta recipe from a reliable book and double or triple it. You can always lay out any uncooked noodles on wax paper, roll it, wrap it in foil, and keep it in the refrigerator for up to week of in the freezer for up to a month.

Preparation
Boil water in a large, deep pan
Undercook the pasta: if using fresh pasta, simply drop it in for a minute or so and pull it right back out with tongs (We just do 2-3 pieces at a time so they don't stick together.)
Dip the partially-cooked pasta in a bowl of ice-cold water to stop the cooking process
Spread pasta on towels and allow to dry (enough to eliminate excess liquid, but still remain pliable)


Sauce 2: Bechamel Sauce (This is "the glue" of the pasta, and we generally double or triple the recipe as well. Wait until the pasta is drying and you're close to lasagna assembly before making this.)

What you'll need
1/2 stick of butter
4 tbsp flour
salt and pepper
pint of whole milk

Preparation
Drop butter, flour, salt and pepper in a hot skillet or frying pan
Wuickly brown all together, being careful not to burn
When it is almost a paste, add milk
Stir for a long time, until creamy


Assembly

What you'll need
Meat sauce (above)
Bechamel sauce (above)
Cooked lasagna (above)
Parmesan cheese, grated

Preparation
  • In large rectangular baking pan, spread a thin layer of meat sauce to coat bottom and avoid sticking
  • Spread a layer of noodles on the bottom of pan, cutting pieces to fill any small areas
  • Spread a layer of meat sauce to coat pasta
  • Add a layer of bechamel sauce (drizzle it over existing sauce and smooth out slightly to distribute
  • Sprinkle a layer of parmesan cheese over entire area
  • Continue to layer pasta, meat sauce, bechamel sauce, and parmesan until pan is full or you run out of one or more ingredients
  • Insert a small amount of remaining meat sauce between edges of pan and pasta to avoid sticking

Cooking and Serving
  • You can prepare the lasagna a day in advance if desired, keeping it covered in foil in your refrigerator until a few hours before cooking and serving. 
  • Bake at a high-temperature (425-450 degrees) loosely covered in foil until sauce is bubbling at edges--40-60 minutes, depending on size and number of layers
  • Remove foil after 30 minutes or so to allow excess water to burn off and top/sides to brown. Loosely cover again to prevent burning if more time is needed after this occurs.
  • Test center for done-ness by inserting a clean knife and pulling back to see if sauce if cooked and runny
This meal is a labor of love, but it is well worth it. One side effect, though, is that it will forever ruin you for restaurant lasagna. It simply cannot compare.